

Master Your Kenmore Elite Gas Range: Troubleshooting Guide
Welcome to the Kenmore Elite Gas Range Troubleshooting Guide! Whether you’re a seasoned chef or just starting your culinary journey, having issues with your gas range can be frustrating. But fear not!
“Solve. Cook. Enjoy. Your ultimate Kenmore Elite Gas Range companion.”
This guide is here to help you diagnose and solve common problems that may arise with your Kenmore Elite Gas Range.
From burner issues to temperature inconsistencies, we’ve got you covered with step-by-step troubleshooting instructions and maintenance tips to keep your range running smoothly.
10 Common Problems with Kenmore Elite Gas Ranges:
- Burner not igniting.
- Uneven flame or inconsistent heating.
- Gas odor when range is in use.
- Oven not heating up to the set temperature.
- Oven door not closing properly.
- Self-cleaning cycle not working.
- Control panel not responding.
- Burner knobs difficult to turn or broken.
- Excessive noise during operation.
- Clock or timer display malfunctioning.
Possible Damaged Parts and Troubleshooting Guide:
- Burner not Igniting:
- Possible Damaged Part: Igniter or Spark Module.
- Troubleshooting:
- Check for any food debris blocking the igniter.
- Ensure the gas supply valve is open.
- Test the igniter for continuity using a multimeter.
- Replace the igniter or spark module if necessary.
- Uneven Flame or Inconsistent Heating:
- Possible Damaged Part: Burner or Gas Valve.
- Troubleshooting:
- Clean the burner ports to remove any clogs.
- Adjust the burner cap to ensure proper airflow.
- Test the gas valve for proper operation.
- Replace the burner or gas valve if needed.
- Gas Odor When Range is in Use:
- Possible Damaged Part: Gas Supply Line or Regulator.
- Troubleshooting:
- Check for any leaks in the gas supply line.
- Ensure the regulator is properly installed and functioning.
- Tighten any loose connections.
- Replace the gas supply line or regulator if there are signs of damage.
- Oven Not Heating up to the Set Temperature:
- Possible Damaged Part: Oven Igniter or Thermostat.
- Troubleshooting:
- Verify that the oven is not in the self-cleaning mode.
- Check the igniter for signs of wear or damage.
- Test the thermostat for continuity.
- Replace the igniter or thermostat if necessary.
- Oven Door Not Closing Properly:
- Possible Damaged Part: Door Hinge or Gasket.
- Troubleshooting:
- Inspect the door gasket for any tears or gaps.
- Ensure the hinges are properly aligned and lubricated.
- Adjust the tension on the door springs if needed.
- Replace the door gasket or hinges if they are damaged.
- Self-Cleaning Cycle Not Working:
- Possible Damaged Part: Thermal Fuse or Control Board.
- Troubleshooting:
- Check the thermal fuse for continuity.
- Test the control board for any malfunctioning components.
- Reset the thermal fuse or replace it if necessary.
- Replace the control board if it’s defective.
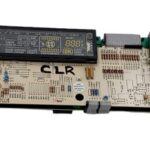
- Control Panel Not Responding:
- Possible Damaged Part: Control Board or Keypad.
- Troubleshooting:
- Check for any loose connections or damaged wires.
- Reset the control board by unplugging the range for a few minutes.
- Test the keypad for proper function.
- Replace the control board or keypad if they are faulty.
- Burner Knobs Difficult to Turn or Broken:
- Possible Damaged Part: Knob or Valve Stem.
- Troubleshooting:
- Clean the knob and valve stem to remove any debris.
- Lubricate the valve stem with silicone grease.
- Replace the knob or valve stem if they are damaged.
- Excessive Noise During Operation:
- Possible Damaged Part: Blower Motor or Fan Blade.
- Troubleshooting:
- Check for any obstructions in the blower motor or fan blade.
- Inspect the motor bearings for signs of wear.
- Replace the blower motor or fan blade if necessary.
- Clock or Timer Display Malfunctioning:
- Possible Damaged Part: Control Board or Display Panel.
- Troubleshooting:
- Reset the control board by unplugging the range for a few minutes.
- Test the control board for any malfunctioning components.
- Replace the control board or display panel if they are defective.
Troubleshooting Guide: Why Your Gas Range Oven Won’t Turn On
“Discover solutions now to get your oven back up and running! Dive into troubleshooting.”
You May Need Theses Parts or Guides:
- Thermador Range Relay Control Board 16-10-660 00415618
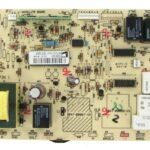
- Frigidaire Oven Control Board 316272206
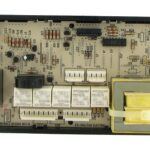
- Thermador Range Control Board 010-00157-02
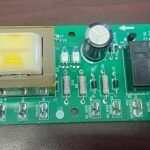
- Oven Control Panel W10517896 W10617330 3023327 AP5787789
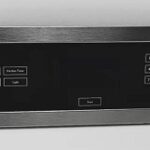
- Range Control Board 4453377 4451653 4452482 4453167 4453167R
Maintenance Tips for Kenmore Elite Gas Range:
- Regularly clean the burners, burner caps, and grates to ensure proper airflow and heating.
- Check and clean the oven door gasket to prevent heat loss and ensure a proper seal.
- Clean the oven interior regularly to remove any food spills or debris.
- Inspect and clean the oven vent to prevent airflow obstruction.
- Test the oven temperature periodically using an oven thermometer to ensure accuracy.
- Keep the control panel and knobs clean and dry to prevent damage and malfunction.
- Avoid using abrasive cleaners or harsh chemicals on the range surfaces to prevent damage.
- Schedule regular professional maintenance to check for any potential issues and ensure optimal performance.
By following these troubleshooting tips and maintenance guidelines, you can keep your Kenmore Elite Gas Range in top condition and enjoy hassle-free cooking for years to come!
Find the Best Deals on Kenmore Elite Gas Range Parts!
“Shop now on eBay for unbeatable deals on genuine Kenmore Elite Gas Range parts!”
View Other “Range Troubleshooting Guides”:
- GE Electric Range Troubleshooting Guide
- Whirlpool Gas Range Troubleshooting Guide
- Frigidaire Electric Range Troubleshooting Guide
You might be interested:
