
Welcome to the Kenmore Elite Gas Range Troubleshooting Guide, your comprehensive resource for addressing common issues and finding solutions for your appliance.
Whether you’re facing problems with ignition, uneven cooking temperatures, or oven functionality, this guide provides step-by-step instructions and helpful tips to help you troubleshoot and resolve the issues with your Kenmore Elite Gas Range.
“Empower Yourself with the Kenmore Elite Gas Range Troubleshooting Guide for Seamless Cooking”
Content
- Introduction to Kenmore Elite Gas Range
- Types of Kenmore Elite Gas Range
- Kenmore Elite Gas Range Series
- Popular Models of Kenmore Elite Gas Range
- Common Problems with Kenmore Elite Gas Range
- Commonly Damaged Parts of Kenmore Elite Gas Range
- Troubleshooting Guide for Kenmore Elite Gas Range
- General Error Codes of Kenmore Gas Range
- Maintenance Tips for Kenmore Elite Gas Range
- Conclusion
- FAQs
Introduction to Kenmore Elite Gas Range
The Kenmore Elite Gas Range is a high-quality and versatile cooking appliance designed to meet the needs of home chefs. Known for its performance, durability, and sleek design, the Kenmore Elite Gas Range offers a range of features and functionalities to enhance your cooking experience.
With precise temperature control, multiple burners, spacious oven capacity, and innovative cooking options, this gas range provides the tools necessary to prepare delicious meals with ease.
Whether you’re a beginner or an experienced cook, the Kenmore Elite Gas Range offers a reliable and efficient cooking solution for your kitchen.
In this guide “Kenmore Elite Gas Range Troubleshooting“, we will explore various aspects of troubleshooting, maintenance, and understanding the different components of the Kenmore Elite Gas Range to help you make the most of this appliance.
Types of Kenmore Elite Gas Range
The Kenmore Elite Gas Range is available in several types to cater to different cooking needs and preferences. Here are some common types of Kenmore Elite Gas Ranges:
Freestanding Gas Range: This type of gas range is designed to stand independently in your kitchen and typically features a backsplash and controls on the front panel.
Slide-In Gas Range: A slide-in gas range fits seamlessly between cabinets and countertops, providing a more built-in and streamlined appearance.
Double Oven Gas Range: Ideal for those who frequently cook multiple dishes simultaneously, a double oven gas range offers two separate oven compartments, allowing you to bake or roast at different temperatures.
Pro-Style Gas Range: Pro-style gas ranges are known for their commercial-grade performance and professional aesthetics, often featuring high-powered burners, larger oven capacity, and stylish design elements.
Convection Gas Range: Convection technology circulates hot air inside the oven, resulting in more even and efficient cooking. Convection gas ranges are equipped with a fan that helps distribute heat evenly for better baking and roasting results.
Self-Cleaning Gas Range: This type of gas range includes a self-cleaning feature, which uses high heat to burn off food residue and grease, making it easier to clean the oven.
Note: These are just a few examples of the types of Kenmore Elite Gas Ranges available. Each type offers unique features and benefits, allowing you to choose the one that best suits your cooking style and kitchen requirements.
Kenmore Elite Gas Range Series
Kenmore Elite Gas Ranges are available in different series, each offering distinct features and design elements. The following are some notable series of Kenmore Elite Gas Ranges:
Kenmore Elite 790 Series: This series showcases a range of gas ranges with various burner configurations, oven capacities, and advanced features like convection cooking and self-cleaning options.
Kenmore Elite 750 Series: The 750 series features gas ranges that combine style and functionality. These ranges often include high-powered burners, spacious ovens, and sleek, modern designs.
Kenmore Elite 79043 Series: This series emphasizes energy efficiency and innovative technology. Gas ranges in this series often come with features like induction cooktops, dual fuel options, and precise temperature control.
Kenmore Elite 79029 Series: Known for their reliability and performance, the 79029 series offers gas ranges with versatile cooktop configurations, spacious oven capacities, and intuitive controls.
Kenmore Elite 7523 Series: This series focuses on pro-style gas ranges, offering powerful burners, convection ovens, and stylish design elements inspired by commercial-grade appliances.
These are just a few examples of the Kenmore Elite Gas Range series available. Each series may have its own unique features and specifications, allowing you to choose the one that best aligns with your cooking needs and preferences.
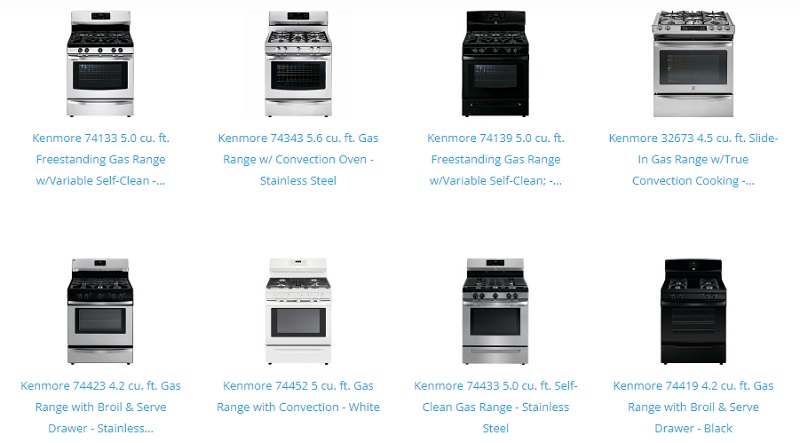
Popular Models of Kenmore Elite Gas Range
Listed below are 20 popular models of Kenmore Elite Gas Range:
- Kenmore Elite 75232 5.6 cu. ft. Gas Range with True Convection
- Kenmore Elite 75223 5.8 cu. ft. Gas Range with Convection
- Kenmore Elite 75353 6.1 cu. ft. Gas Range with Steam & Dual Fuel
- Kenmore Elite 75443 5.9 cu. ft. Gas Range with True Convection
- Kenmore Elite 75233 5.6 cu. ft. Gas Range with Dual Fuel
- Kenmore Elite 75233 6.1 cu. ft. Gas Range with Dual Fuel
- Kenmore Elite 75303 6.1 cu. ft. Gas Range with Steam & Dual Fuel
- Kenmore Elite 75343 6.1 cu. ft. Gas Range with Steam & Dual Fuel
- Kenmore Elite 75229 6.1 cu. ft. Gas Range with True Convection
- Kenmore Elite 75323 6.1 cu. ft. Gas Range with Steam & Dual Fuel
- Kenmore Elite 75353 6.1 cu. ft. Gas Range with Steam & Dual Fuel and Accela Heat
- Kenmore Elite 75449 6.1 cu. ft. Gas Range with True Convection and Accela Heat
- Kenmore Elite 75343 6.1 cu. ft. Gas Range with Steam & Dual Fuel and Accela Heat
- Kenmore Elite 75239 6.1 cu. ft. Gas Range with True Convection and Accela Heat
- Kenmore Elite 75443 6.1 cu. ft. Gas Range with True Convection and Accela Heat
- Kenmore Elite 75353 6.1 cu. ft. Gas Range with Steam & Dual Fuel and Accela Heat Ultra
- Kenmore Elite 75449 6.1 cu. ft. Gas Range with True Convection and Accela Heat Ultra
- Kenmore Elite 75343 6.1 cu. ft. Gas Range with Steam & Dual Fuel and Accela Heat Ultra
- Kenmore Elite 75239 6.1 cu. ft. Gas Range with True Convection and Accela Heat Ultra
- Kenmore Elite 75443 6.1 cu. ft. Gas Range with True Convection and Accela Heat Ultra
These models offer a range of features, capacities, and cooking options, allowing you to find a Kenmore Elite Gas Range that suits your specific requirements.
Common Problems with Kenmore Elite Gas Range
Listed below are ten common problems that can occur with Kenmore Elite gas ranges:
- Gas burner not igniting.
- Uneven cooking temperatures.
- Oven not heating up.
- Burner flames are too high or too low.
- Self-cleaning feature not working.
- Oven door not closing properly.
- Control panel not responding.
- Gas odor during or after use.
- Igniter clicking but not igniting.
- Error codes appearing on the display.
Please keep in mind that these are general issues, and the specific troubleshooting steps may vary depending on the model of your Kenmore Elite gas range.
“Discover the comprehensive Kenmore Elite Gas Range Troubleshooting Guide, complete with causes and solutions, exclusively at Repair Clinic. Don’t wait any longer – Fix it now!“
Commonly Damaged Parts of Kenmore Elite Gas Range
Here are some commonly damaged parts of a Kenmore Elite Gas Range:
Igniter: The igniter is responsible for igniting the gas and starting the burner. It can become worn out or damaged over time, resulting in issues with ignition.
Burner Grates: The burner grates, which support the cookware, can get damaged or become worn out due to constant use and exposure to heat. They may develop cracks or lose their original shape.
Control Knobs: Control knobs can break or become loose, making it difficult to adjust the flame intensity or select the desired settings.
Oven Door Gasket: The oven door gasket forms a seal to keep heat inside the oven. It can wear out or get damaged, leading to heat loss and inefficient cooking.
Oven Igniter: The oven igniter is responsible for igniting the gas to heat up the oven. Over time, it may fail to ignite, resulting in the oven not reaching the desired temperature.
Thermostat: The thermostat regulates the oven temperature. If it malfunctions, the oven may not heat up properly or may overheat.
Control Panel: The control panel houses the electronic controls for the range. Physical damage or electrical issues can cause the control panel to malfunction or become unresponsive.
Gas Valves: Gas valves control the flow of gas to the burners. If they become faulty, they may not deliver the correct amount of gas, resulting in inconsistent or inadequate flame.
Oven Racks: Oven racks can become bent, warped, or damaged, making it difficult to slide them in and out or causing uneven cooking.
Door Hinges: The door hinges allow the oven door to open and close smoothly. If they become loose or damaged, the door may not close properly, leading to heat loss.
These are some common parts that may experience wear and tear or damage over time. If you encounter any issues with these components, it is advisable to consult a professional technician for repair or replacement.
“Find and Order Kenmore Elite Gas Range Replacement Parts Now! Fast Shipping Available at Repair Clinic.”
Kenmore Elite Gas Range Troubleshooting Guide
The Troubleshooting Guide for Kenmore Elite Gas Range is designed to assist you in diagnosing and resolving common issues that may arise with your appliance.
Whether you are experiencing problems with ignition, temperature control, or other malfunctions, this guide will provide step-by-step instructions and tips to help you troubleshoot and potentially fix the problem on your own.
Gas Burner Not Igniting
If you’re facing the issue of a gas burner not igniting on your Kenmore Elite gas range, several factors could be causing the problem. Here are some possible causes, damaged parts, step-by-step troubleshooting instructions, and helpful tips to assist you in resolving the issue:
Possible Causes:
- Igniter: The igniter may be faulty, worn out, or dirty, preventing it from producing the necessary spark to ignite the gas.
- Gas Supply: Ensure that the gas supply valve for the range is fully open, as a partially closed valve can restrict the flow of gas.
- Burner Cap or Head: If the burner cap or head is misaligned, dirty, or clogged with debris, it can obstruct the flow of gas and hinder proper ignition.
- Control Knob: A loose or damaged control knob can affect the connection between the knob and the gas valve, resulting in ignition issues.
Possible Damaged Parts:
- Igniter: The igniter itself may be damaged and need to be replaced if it is not producing a spark.
- Control Knob: A faulty or broken control knob may need to be repaired or replaced.
Step-by-Step Troubleshooting:
- Ensure Safety: Before troubleshooting, turn off the gas supply to the range and unplug it from the power source.
- Clean the Igniter: Carefully clean the igniter with a soft brush or cloth to remove any dirt, grease, or debris that may be hindering its performance.
- Check Gas Supply: Verify that the gas supply valve for the range is fully open to ensure an adequate flow of gas.
- Inspect the Burner Cap and Head: Remove the burner cap and head, clean them thoroughly, and check for any blockages or misalignments. Realign and clean them if necessary.
- Check the Control Knob: Ensure that the control knob is securely attached and not loose or damaged. If it is, consider repairing or replacing it.
Helpful Tips:
- Regularly clean the burner caps and heads to prevent blockages and ensure proper gas flow.
- Exercise caution when cleaning the igniter to avoid damaging it. Avoid using harsh chemicals or abrasive materials.
- If you are uncertain or uncomfortable performing any troubleshooting steps, it is recommended to seek assistance from a professional technician.
By following these troubleshooting steps and tips, surely you can often diagnose and resolve the issue of a gas burner not igniting on your Kenmore Elite gas range.
However, if the problem persists, it is recommended to consult a qualified technician for further inspection and repair.
Uneven Cooking Temperatures
Uneven cooking temperatures in a Kenmore Elite gas range can lead to food being overcooked in some areas while undercooked in others.
This section of the Kenmore Elite gas range troubleshooting guide will outline the possible causes, damaged parts that may contribute to the issue, step-by-step troubleshooting instructions, and some helpful tips.
Causes:
- Faulty Igniter: A malfunctioning igniter can lead to uneven flame distribution and inconsistent heat output.
- Damaged Burner or Burner Cap: If a burner or its cap is damaged or misaligned, it can disrupt the flow of gas, resulting in uneven cooking temperatures.
- Worn-out Gas Valve: A worn-out gas valve may not properly control the gas flow, causing uneven heat distribution.
- Improperly Calibrated Oven Temperature Sensor: If the oven temperature sensor is not calibrated correctly, it may provide inaccurate temperature readings, leading to uneven cooking.
Possible Damaged Parts:
- Igniter
- Burner or Burner Cap
- Gas Valve
- Oven Temperature Sensor
Troubleshooting Steps:
- Ensure the gas range is properly installed and level.
- Clean the burners and burner caps to remove any debris or residue that could be affecting the gas flow.
- Check the igniter for signs of damage or wear. Replace if necessary.
- Verify that the gas valve is functioning correctly by checking for any leaks or irregular gas flow.
- Calibrate the oven temperature sensor according to the manufacturer’s instructions or consult a professional technician if needed.
Tips:
- Preheat the oven for the recommended amount of time to allow for better heat distribution.
- Rotate pans halfway through the cooking process to ensure even exposure to heat.
- Use oven thermometers to verify the accuracy of the temperature settings.
- Avoid overcrowding the oven or placing items too close together, as this can impede proper air circulation and result in uneven cooking.
Following these troubleshooting steps and implementing the provided tips, no question you can address the issue of uneven cooking temperatures in your Kenmore Elite gas range and achieve more consistent and satisfactory cooking results.
Oven Not Heating Up
If your Kenmore Elite Gas Range oven is not heating up, it can be frustrating. Shared below are some possible causes of the problem, damaged parts to check, and step-by-step troubleshooting tips to help you resolve the issue:
Possible Causes:
- Gas Supply Issue: Ensure that the gas supply to the range is turned on and that there are no issues with the gas line or gas valve.
- Igniter Malfunction: A faulty igniter may fail to ignite the gas, preventing the oven from heating up.
- Gas Valve Problem: If the gas valve is defective, it may not allow the flow of gas to the burner, resulting in no heat production.
- Electronic Control Board Failure: A malfunctioning control board can disrupt the operation of the oven and prevent it from heating properly.
- Temperature Sensor Failure: A faulty temperature sensor can inaccurately detect the oven temperature, leading to improper heating.
Possible Damaged Parts to Check:
- Igniter: Inspect the igniter for any signs of damage, such as cracks or breaks.
- Gas Valve: Check the gas valve for proper functionality, ensuring it is opening and allowing the flow of gas.
- Main Control Board: Examine the control board for any visible damage, such as burn marks or loose connections.
- Temperature Sensor: Inspect the temperature sensor for any signs of damage or disconnection.
Step-by-Step Troubleshooting:
- Verify Gas Supply: Ensure that the gas supply to the range is turned on and that there are no issues with the gas line or gas valve.
- Check Igniter: If the igniter appears damaged or doesn’t glow when the oven is turned on, it may need to be replaced.
- Test Gas Valve: Confirm that the gas valve is functioning properly by checking if gas flows when the oven is turned on.
- Inspect Control Board: Examine the control board for any visible damage, loose connections, or burnt-out components. If necessary, consult a professional technician for repair or replacement.
- Assess Temperature Sensor: Use a multimeter to test the temperature sensor for proper resistance. If it’s not within the expected range, it may need to be replaced.
Tips:
- Ensure the oven is completely cooled before performing any troubleshooting steps.
- Consult the Kenmore Elite Gas Range owner’s manual or contact Kenmore customer support for specific troubleshooting instructions related to your model.
- If you’re uncomfortable or unsure about performing any troubleshooting steps, it’s recommended to seek professional assistance from a qualified technician.
By following these troubleshooting steps and tips, you can diagnose the cause of your Kenmore Elite Gas Range oven not heating up and take appropriate measures to fix the problem.
Burner Flames Are Too High or Too Low
When encountering the issue of burner flames being either too high or too low on your Kenmore Elite gas range, several factors could contribute to the problem.
Here are the causes, possible damaged parts, step-by-step troubleshooting, and tips to help you address this issue:
Causes:
- Clogged Burner Ports: Accumulated debris or grease can obstruct the burner ports, resulting in uneven flames.
- Misaligned Burner Caps: If the burner caps are not correctly aligned, it can disrupt the flow of gas, leading to inconsistent flame heights.
- Gas Pressure Issues: Insufficient or excessive gas pressure can cause the burner flames to be too low or too high.
- Damaged Gas Valve: A faulty gas valve can fail to regulate the gas flow, resulting in irregular flame levels.
Possible Damaged Parts:
- Burner Ports: The burner ports may become clogged or blocked, affecting the flame quality.
- Burner Caps: Misaligned or damaged burner caps can disrupt the gas flow and flame distribution.
- Gas Valve: A malfunctioning gas valve may not regulate the gas flow properly, impacting the flame height.
Step-by-Step Troubleshooting:
- Turn off the burner and ensure it is completely cool before proceeding.
- Remove the burner cap and inspect the burner ports for any debris or blockages. Clean the ports with a soft brush or a toothpick.
- Check the alignment of the burner caps and make sure they are positioned correctly. Adjust them if necessary.
- Verify the gas pressure by contacting your gas utility provider or a professional technician. They can measure and adjust the pressure if needed.
- If the issue persists, it could indicate a faulty gas valve. In such cases, it is recommended to consult a qualified technician for inspection and potential replacement.
Tips:
- Regularly clean the burner ports and burner caps to prevent debris buildup that can affect flame quality.
- Ensure proper alignment of the burner caps after cleaning or removal.
- Use caution when handling and cleaning the burner components to avoid damage or injury.
- If the gas pressure seems irregular throughout your house, contact your gas utility provider to assess and adjust the pressure as necessary.
Keep in mind, safety is paramount when troubleshooting gas appliances. If you are uncertain or uncomfortable performing any troubleshooting steps, it is always advisable to seek assistance from a professional technician to ensure proper diagnosis and resolution of the issue.
Self-Cleaning Feature Not Working
When the self-cleaning feature of your Kenmore Elite gas range is not working, it can be frustrating. Here are some potential causes of the problem, possible damaged parts, step-by-step troubleshooting, and tips to help you address the issue:
Causes of the Problem:
- Faulty door lock mechanism.
- Malfunctioning temperature sensor.
- Clogged or damaged oven vents.
- Electrical issues affecting the self-cleaning cycle.
Possible Damaged Parts:
- Door lock assembly.
- Temperature sensor.
- Oven vent covers.
- Control board or wiring.
Step-by-Step Troubleshooting:
- Check the door lock mechanism: Ensure that the door lock is engaged and functioning properly. If it’s loose or damaged, it may need to be replaced.
- Inspect the temperature sensor: Verify if the temperature sensor is working correctly. If it’s faulty, it may prevent the self-cleaning feature from activating. Consider replacing the sensor if necessary.
- Clean the oven vents: Remove any debris or blockage from the oven vents to ensure proper airflow during the self-cleaning process. Blocked vents can interfere with the feature’s functionality.
- Check for electrical issues: Examine the control board and wiring connections for any signs of damage or loose connections. Faulty electrical components can disrupt the self-cleaning cycle.
Tips:
- Consult the user manual: Refer to the manufacturer’s instructions for specific guidance on troubleshooting and maintenance of your Kenmore Elite gas range.
- Power cycle the appliance: Turn off the gas range and unplug it from the power source for a few minutes. Then, plug it back in and try initiating the self-cleaning feature again.
- Be cautious with DIY repairs: If you’re uncomfortable or unsure about repairing or replacing damaged parts, it’s recommended to seek professional assistance to avoid any potential risks or further damage to the appliance.
- Regular maintenance: Clean your gas range regularly and remove any spills or food debris promptly to help prevent issues with the self-cleaning feature.
Remember, if the troubleshooting steps do not resolve the problem, it’s advisable to contact a qualified technician or the Kenmore customer support for further assistance.
Oven Door Not Closing Properly
When your Kenmore Elite gas range oven door is not closing properly, it can lead to heat loss, inefficient cooking, and safety concerns. Here’s a troubleshooting guide to help you address this issue:
Causes of the Problem:
- Misaligned Door Hinges: Over time, the oven door hinges can become misaligned, preventing the door from closing properly.
- Worn or Damaged Door Gasket: The door gasket creates a seal between the oven door and the oven cavity. If it is worn out or damaged, it may not provide a tight seal, resulting in an improper closure.
Possible Damaged Parts:
- Door Hinges: The hinges may be loose, damaged, or out of alignment.
- Door Gasket: The gasket may be torn, worn out, or have gaps.
Step-by-Step Troubleshooting:
- Inspect the Hinges: Check if the hinges are loose, damaged, or misaligned. Tighten any loose screws and realign the hinges if necessary.
- Examine the Door Gasket: Inspect the door gasket for any tears, signs of wear, or gaps. Clean the gasket with mild soap and water, and ensure it is properly seated along the edges of the oven door.
- Adjust the Door Tension: Some Kenmore Elite gas ranges have adjustable door tension. Consult your user manual for instructions on how to adjust the tension and ensure a proper closure.
- Test the Door Closure: Close the oven door and check if it closes securely and forms a tight seal. If the problem persists, proceed to the next step.
Tips:
- Clean the Hinges and Track: Regularly clean the hinges and the track where the hinges fit into the oven. Remove any debris or residue that may hinder proper door closure.
- Replace the Door Gasket: If the door gasket is severely worn, torn, or damaged, it may need to be replaced. Contact the manufacturer or a professional technician to obtain the correct replacement gasket and for assistance with installation.
Note: If you’re unsure or uncomfortable performing any troubleshooting steps, it’s recommended to consult a qualified technician for further assistance.
Control Panel Not Responding
If you’re facing issues with your Kenmore Elite gas range where the control panel is not responding, it can be frustrating and hinder your ability to operate the appliance effectively.
Below are some potential causes, damaged parts, troubleshooting steps, and tips to help you resolve the problem:
Causes of the Problem:
- Power supply issues, such as a tripped circuit breaker or a loose power cord connection.
- Malfunctioning control board or keypad.
- Wiring or connection problems within the control panel.
- Software glitches or errors in the control panel system.
Possible Damaged Parts:
- Control board or electronic control module.
- Keypad or touchpad.
Step-by-Step Troubleshooting:
- Ensure that the gas range is properly connected to a power source and that the outlet is functioning. Check the circuit breaker and reset it if necessary.
- Verify that the power cord is securely plugged into the outlet and the range.
- If the control panel remains unresponsive, try a hard reset by unplugging the range from the power source for a few minutes, then plugging it back in.
- Check for any visible signs of damage or loose connections on the control board and keypad. If found, consider replacing the damaged part(s).
- If you suspect a software issue, try performing a factory reset by referring to the manufacturer’s instructions or user manual.
- If none of the above steps resolve the issue, it’s recommended to seek professional assistance from a qualified technician or contact Kenmore’s customer support for further guidance.
Tips:
- Always follow safety precautions, such as turning off the power supply before attempting any troubleshooting or repairs.
- Keep the control panel clean and free from spills or debris, as this can affect its functionality.
- Regularly inspect the control board and keypad for any signs of wear or damage and address them promptly to prevent further issues.
Remember, troubleshooting and repairing electrical components can be complex and potentially dangerous.
Note: If you are uncertain or uncomfortable performing any steps, it is best to consult a professional technician to ensure safe and accurate diagnosis and repair.
Gas Odor During or After Use
Causes of the Problem:
- Gas leak: A gas odor during or after use may indicate a gas leak within the Kenmore Elite gas range.
- Faulty gas supply line: A damaged or loose gas supply line can result in gas leaks and cause a noticeable odor.
Possible Damaged Parts:
- Gas supply line: The gas supply line may be damaged, cracked, or improperly connected, leading to a gas leak and odor.
Step-by-Step Troubleshooting:
- Ensure safety: If you detect a strong gas odor, open windows and doors to ventilate the area. Do not use any electrical switches or appliances, and avoid open flames or sparks. Leave the vicinity immediately and contact your gas supplier or emergency services if necessary.
- Check for visible leaks: Inspect the gas supply line and connections for any visible signs of leakage, such as hissing sounds or bubbling soapy water. If you identify a leak, shut off the gas supply to the appliance and contact a professional technician for repairs.
- Verify gas valve position: Ensure that the gas shut-off valve for the range is fully open. If it’s partially closed, it may result in inadequate gas flow and cause a gas odor. Turn the valve clockwise to open it fully.
- Test for leaks: Apply a mixture of water and dish soap to the gas supply line connections. If you see bubbles forming, it indicates a leak. In such cases, tighten the connections or consider replacing the gas supply line if it is damaged.
- Professional assistance: If you cannot identify or fix the issue, it is recommended to contact a qualified technician to inspect and repair the gas range.
Tips:
- Regular maintenance: Schedule periodic inspections and maintenance for your gas range to ensure proper functioning and minimize the risk of gas leaks.
- Proper installation: If you recently installed or replaced the gas supply line, ensure it is correctly installed according to the manufacturer’s instructions or consult a professional installer.
- Use a gas detector: Consider installing a gas detector near your gas range. It can help alert you to the presence of gas leaks, providing an additional safety measure.
Please note that gas leaks are a serious concern, and if you suspect a significant leak or cannot resolve the issue yourself, it is crucial to contact a professional technician or your gas supplier immediately for assistance.
Igniter Clicking but Not Igniting
Causes of the Problem:
- Dirty or clogged igniter: A buildup of food debris or grease on the igniter can prevent it from generating a spark, even though it may still produce a clicking sound.
- Faulty igniter: Over time, the igniter may wear out or become damaged, resulting in a weak or intermittent spark that fails to ignite the gas.
- Gas supply issue: If there is an issue with the gas supply, such as a closed valve or low gas pressure, the igniter may not be able to ignite the gas.
Possible Damaged Parts:
- Igniter: The igniter itself may be damaged, worn out, or malfunctioning.
- Ignition module: The ignition module, responsible for generating the spark, could be faulty.
- Wiring or connections: Loose or damaged wiring or connections between the igniter and the control module can also cause the igniter to click but not ignite.
Step-by-Step Troubleshooting:
- Ensure safety: Turn off the gas supply and unplug the range before attempting any troubleshooting.
- Clean the igniter: Gently clean the igniter with a soft brush or a toothbrush to remove any debris or residue that may be obstructing the spark.
- Check the gas supply: Ensure the gas valve is fully open and the gas supply is sufficient. Test other gas appliances in your home to confirm if there is a gas supply issue.
- Inspect the igniter: Examine the igniter for signs of damage, such as cracks or visible wear. If damaged, it may need to be replaced.
- Test the igniter: Turn on the gas and observe the igniter while listening for the clicking sound. If it does not produce a spark or the spark is weak, it may be faulty and require replacement.
- Check the wiring and connections: Inspect the wiring and connections between the igniter and the control module. Ensure they are secure and undamaged. Repair or replace any faulty wiring or connections as needed.
- Consult a professional: If the issue persists or if you are unsure about performing further troubleshooting, it is recommended to seek assistance from a qualified technician.
Tips:
- Regularly clean the igniter to prevent debris buildup and ensure proper functioning.
- Be cautious and follow safety protocols when working with gas appliances.
- Consider seeking professional help if you are uncomfortable with troubleshooting or if the issue requires specialized knowledge or tools.
Don’t forget, if you are uncertain or unable to troubleshoot the problem on your own, it is best to consult a professional technician who can accurately diagnose and fix the issue with your Kenmore Elite Gas Range.
Error Codes Appearing on the Display
Error codes appearing on the display of your Kenmore Elite Gas Range can indicate specific issues or malfunctions with the appliance. Here are some common causes, possible damaged parts, and step-by-step troubleshooting tips to help you address this problem:
Causes of the Problem:
- Electrical Malfunction: An error code on the display may be the result of an electrical issue or a communication problem between components.
- Sensor or Circuit Failure: Faulty sensors or circuitry can trigger error codes to appear on the display, indicating a malfunction in a specific area of the gas range.
- Control Board Malfunction: A damaged or malfunctioning control board can lead to error codes being displayed.
Possible Damaged Parts:
- Control Board: The control board is responsible for sending signals and controlling various functions of the gas range. If it is damaged or faulty, error codes may appear on the display.
- Sensors: Various sensors throughout the appliance, such as temperature sensors or pressure sensors, can malfunction and trigger error codes.
Step-by-Step Troubleshooting:
- Check the Error Code: Take note of the specific error code displayed on the control panel. This code can provide insight into the nature of the problem.
- Consult the Manual: Refer to the user manual for your Kenmore Elite Gas Range. It may contain a list of error codes and their corresponding explanations or recommended actions.
- Power Reset: Turn off the gas range and unplug it from the power source. Wait for a few minutes before plugging it back in. This power reset may clear minor glitches and reset the control board.
- Check Connections: Inspect the electrical connections and ensure they are secure. Loose connections can cause communication errors and trigger error codes.
- Perform a Diagnostic Test: Some Kenmore Elite Gas Ranges have diagnostic modes that can help identify the source of the problem. Refer to the manual for instructions on how to enter the diagnostic mode and interpret the results.
- Contact Customer Support: If the error code persists or you are unable to determine the cause of the issue, reach out to Kenmore customer support or schedule a service appointment for further assistance.
Tips:
- Take a photo or note down the error code displayed for future reference when contacting customer support or researching online.
- Keep the gas range’s model number and serial number handy when seeking assistance, as it will help identify the specific appliance and potential solutions.
Remember, troubleshooting error codes on your Kenmore Elite Gas Range requires caution and, if necessary, the involvement of a qualified technician.
General Error Codes of Kenmore Gas Range
While specific error codes can vary depending on the model and version of the Kenmore gas range, here are some general error codes that you may encounter:
- F10: Indicates a problem with the oven temperature sensor or the electronic oven control. It may require sensor replacement or recalibration.
- F11: Points to a communication issue between the control board and the oven lock mechanism. It may require checking the wiring connections or replacing faulty components.
- F30: Indicates a problem with the oven temperature sensor circuit. It may require sensor replacement or checking the wiring connections.
- F31: Suggests an error with the oven temperature sensor circuit. Similar to F30, it may require sensor replacement or checking the wiring connections.
- F90: Indicates a problem with the door lock mechanism. It may require resetting the control board or replacing faulty components.
- F91: Points to a communication issue between the control board and the door lock mechanism. It may require checking the wiring connections or replacing faulty components.
- F93: Indicates a problem with the oven door latch motor assembly. It may require inspecting the motor assembly or replacing faulty components.
- F94: Suggests an error with the oven door latch motor assembly’s communication with the control board. It may require checking the wiring connections or replacing faulty components.
Important: Please note that these are general error codes, and the specific error codes and their meanings may vary for different models and versions of Kenmore gas ranges.
Consult the user manual or contact Kenmore customer support for accurate information and troubleshooting guidance for your specific appliance.
Maintenance Tips for Kenmore Elite Gas Range
IMPORTANT: Maintenance is essential to prevent problems and ensure the longevity of your Kenmore Elite gas range, so please do not neglect it.
Here are some maintenance tips to keep your Kenmore Elite Gas Range in good working condition:
Regular Cleaning: Clean the cooktop, burners, and oven regularly to prevent buildup of grease, food particles, and spills. Use mild soapy water or a non-abrasive cleaner to wipe surfaces. Avoid using abrasive materials or harsh chemicals that could damage the finish.
Clean Burner Grates and Caps: Remove the burner grates and caps, and clean them thoroughly. Soak them in warm, soapy water and scrub off any residue. Rinse and dry before reassembling.
Clean Oven Interior: Remove any leftover food or spills from the oven interior using a damp cloth or sponge. For stubborn stains, use an oven cleaner recommended by the manufacturer.
Check and Clean Burner Openings: Inspect the burner openings for any debris or blockages. Use a soft brush or a paper clip to carefully clean out any buildup.
Inspect Gas Supply Connections: Regularly inspect the gas supply connections to ensure they are secure and free from leaks. If you detect a gas odor or suspect a leak, immediately turn off the gas supply and contact a professional technician.
Check Oven Door Seal: Examine the oven door seal for any signs of damage or wear. Replace the seal if it is loose, torn, or deteriorated to maintain proper heat retention.
Calibrate Oven Temperature: If you notice that your oven temperature is consistently off, consider calibrating it according to the manufacturer’s instructions. This ensures accurate cooking results.
Keep Ventilation Clear: Ensure the ventilation system, including the exhaust hood or fan, is clean and unobstructed. This helps remove odors, steam, and smoke during cooking.
Avoid Excessive Weight: Do not place heavy items on the cooktop or oven door, as they can cause damage or affect the appliance’s balance.
Follow User Manual Guidelines: Always refer to the user manual for specific maintenance instructions and recommended cleaning products. It will provide model-specific tips and safety precautions.
Following these maintenance tips will help keep your Kenmore Elite Gas Range in optimal condition and extend its lifespan.
Conclusion
In conclusion, the Kenmore Elite Gas Range Troubleshooting Guide serves as a valuable resource for addressing common issues that may arise with your appliance.
By following the step-by-step troubleshooting instructions and utilizing the tips provided, you can effectively diagnose and resolve problems such as gas burner ignition, uneven cooking temperatures, oven heating issues, control panel malfunctions, and more.
This guide empowers you to take control of the maintenance and troubleshooting process, potentially saving you time and money by avoiding unnecessary service calls.
Remember, safety should always be a priority when troubleshooting or performing maintenance on your Kenmore Elite Gas Range. If you encounter any issues that require specialized knowledge or involve gas-related concerns, it is recommended to seek professional assistance from a qualified technician.
Additionally, referring to the user manual specific to your model and contacting Kenmore customer support can provide further guidance tailored to your appliance.
By regularly maintaining your Kenmore Elite Gas Range and promptly addressing any issues that arise, you can ensure optimal performance, reliable functionality, and enjoyable cooking experiences for years to come.
With the troubleshooting knowledge and maintenance tips provided in this guide, no question you can confidently navigate and resolve common issues, keeping your Kenmore Elite Gas Range operating at its best.
“Discover the Ultimate Professional Troubleshooting Guide for your Kenmore Elite Gas Range at Repair Clinic. Fix it today!”
FAQs
Q1: How can I obtain a Kenmore Elite gas range troubleshooting manual?
A1: You can find a Kenmore Elite gas range troubleshooting manual by visiting the Kenmore official website and searching for your specific model. The manual will provide detailed instructions and troubleshooting tips for common issues.
Q2: How do I reset a Kenmore oven model 790?
A2: To reset a Kenmore oven model 790, locate the main power switch or circuit breaker that supplies electricity to the oven. Turn off the power for a few minutes, then restore the power. This will reset the oven’s electronics and may resolve minor issues.
Q3: My Kenmore gas oven is not working, but the stove top is functioning fine. What could be the problem?
A3: If the gas oven is not working while the stove top functions properly, the issue could be with the oven’s igniter, gas valve, or temperature sensor. It is recommended to check these components for any signs of damage or malfunction and consider contacting a professional technician for further diagnosis and repair.
Q4: How can I troubleshoot a Kenmore gas oven igniter?
A4: If the gas oven igniter is not working, you can troubleshoot it by checking the wiring connections for any loose or damaged wires. Additionally, you can use a multimeter to test the igniter for continuity. If the igniter fails the continuity test, it may need to be replaced with a new one.
Q5: My Kenmore gas stove/oven is not working at all. What steps should I take?
A5: If your Kenmore gas stove/oven is not working at all, ensure that the gas supply is turned on and that the appliance is properly plugged in. If these basic checks are in order, consult the troubleshooting section of your owner’s manual for specific steps to identify and address the issue. If the problem persists, it is advisable to contact a professional technician for further assistance.
Q6: How can I troubleshoot Kenmore stove troubleshooting codes?
A6: Kenmore stove troubleshooting codes can vary based on the model and version of your stove. Refer to your owner’s manual to find the specific meaning of the code displayed. It may provide instructions on how to resolve the issue. If the code is not listed in the manual or you need further assistance, consider reaching out to Kenmore customer support or a professional technician.
Q7: Where can I find Kenmore gas range parts?
A7: Kenmore gas range parts can be found at authorized Kenmore service centers, appliance parts stores, or online retailers specializing in appliance parts. You can search for the specific part you need by using the model number of your Kenmore gas range.
Other Appliance Repair Guides and Parts:
- DA97-13718C Samsung Refrigerator Ice Maker
- WD21X24901 GE Dishwasher Control Board
- Samsung DA97-14474C Assy Tray Ice
