
Ready to tackle your oven problems like a pro? Explore our comprehensive Whirlpool Oven Troubleshooting Guide now and cook with confidence again.
“Master Your Whirlpool Oven with Our Troubleshooting Tips.”
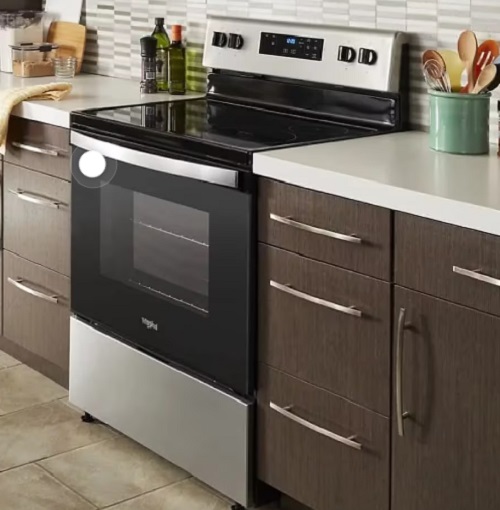
Whirlpool Oven Troubleshooting Guide – Easy DIY
If you’re facing issues with your Whirlpool oven, this comprehensive troubleshooting guide is here to help. We’ll explore 10 common oven problems, identify 10 potential damaged parts, provide a step-by-step troubleshooting guide, and offer essential maintenance tips to keep your oven running smoothly.
10 Common Problems:
- Oven Not Heating: If your oven isn’t reaching the desired temperature, it can lead to undercooked or unevenly baked food.
- Uneven Cooking: Uneven cooking can result from a faulty heating element, a malfunctioning fan, or incorrect rack placement.
- Oven Overheating: When your oven is too hot, it can cause burning or scorching of your dishes.
- Oven Won’t Turn On: If your oven isn’t responding, it might be due to electrical issues or a broken control panel.
- Burned-Out Oven Light: A burnt-out oven light can make it challenging to monitor your cooking progress.
- Oven Door Not Closing Properly: A poorly sealed oven door can affect temperature consistency and cooking quality.
- Self-Cleaning Function Malfunctions: Issues with the self-cleaning feature can stem from a faulty thermostat or a damaged latch.
- Oven Produces Strange Odors or Smoke: Unpleasant smells or smoke can indicate a problem with the oven’s heating element or leftover food debris.
- Timer and Controls Malfunction: When the timer and controls are unresponsive, it can disrupt your cooking routine.
- Excessive Noise: Unusual sounds like rattling or buzzing can signal problems with the fan or motor.
Possible Damaged Parts:
- Heating Element: A damaged or burned-out heating element can result in temperature inconsistencies.
- Thermostat: Faulty thermostats can cause overheating or underheating issues.
- Fan Motor: Malfunctioning fan motors can lead to uneven cooking.
- Control Panel: Issues with the control panel can result in the oven not turning on.
- Oven Light Bulb: A burnt-out light bulb can hinder visibility inside the oven.
- Door Gasket: A damaged door gasket can lead to poor sealing, causing temperature fluctuations.
- Latch or Hinge: Problems with the latch or hinge can affect the oven door’s closure.
- Timer and Controls: Malfunctioning timers and controls can disrupt the cooking process.
- Burner or Igniter: Gas ovens may face issues with the burner or igniter, affecting the oven’s ability to heat.
- Oven Racks: Damaged or incorrectly placed racks can lead to uneven cooking.
You May Need These Parts:
Step-by-Step Troubleshooting Guide:
- Check the Power: Ensure the oven is properly plugged in and the circuit breaker hasn’t tripped.
- Inspect the Heating Element: Examine the heating element for any visible damage or signs of wear.
- Test the Thermostat: Use an oven thermometer to verify if the thermostat is accurate.
- Investigate the Fan Motor: Listen for unusual sounds and ensure the fan is running during operation.
- Inspect the Control Panel: Check for any error codes or malfunctioning buttons.
- Replace the Oven Light Bulb: If it’s burnt out, replace the oven light bulb.
- Examine the Door Gasket: Look for any cracks or damage in the door gasket and replace if necessary.
- Check the Latch and Hinge: Ensure the door closes tightly and securely.
- Inspect Timer and Controls: Test all controls and timers for proper functionality.
- Clean the Oven: Remove any food residue or debris that might be causing strange odors or smoke.
Maintenance Tips:
- Regularly clean your oven to prevent food buildup and strange odors.
- Replace the oven light bulb when it burns out to maintain visibility.
- Avoid using abrasive cleaners that could damage the oven’s interior.
- Clean the door gasket to ensure a proper seal.
- Routinely check the heating element for signs of wear and tear.
- Use oven-safe cookware to prevent damage to oven racks.
By following this comprehensive Whirlpool oven troubleshooting guide and adopting these maintenance tips, you can extend the lifespan of your appliance and enjoy consistent, hassle-free cooking. You can read more Oven Troubleshooting Guides here.
More Range/Oven Troubleshooting Guides:
- Thermador Range Relay Control Board 16-10-660 00415618
 Fix your range today with the Thermador Range Relay Control Board 16-10-660 00415618. Ensure optimal … Read more
 - Frigidaire Oven Control Board 316272206
 Fix your oven today with the Frigidaire Oven Control Board 316272206, ensuring efficient cooking and … Read more
 - Thermador Range Control Board 010-00157-02
 Ensure seamless culinary adventures by promptly repairing your Thermador Range Control Board, model number 010-00157-02, … Read more
 - Oven Control Panel W10517896 W10617330 3023327 AP5787789
 Are you looking for the Oven Control Panel W10517896? Find the perfect replacement to restore … Read more
 - Range Control Board 4453377 4451653 4452482 4453167 4453167R
 Fix your range oven today with the Range Control Board 4453377. Ensure precise temperature control … Read more
