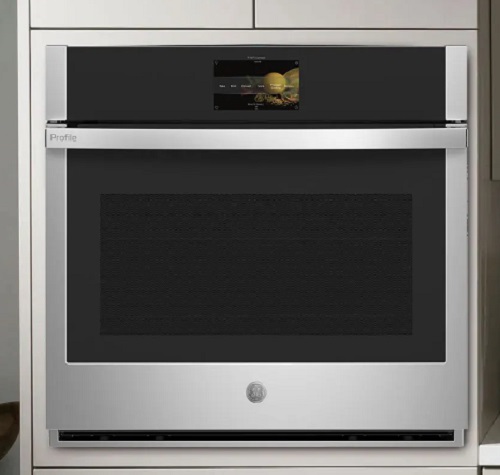
Discover expert solutions to common GE wall oven problems with our comprehensive GE Wall Oven Troubleshooting Guide. Get your oven back in top form today, and enjoy hassle-free cooking once again.
“Cook with Confidence: Your GE Wall Oven Troubleshooting Companion”
GE Wall Oven Troubleshooting Guide: 10 Common Problems and Solutions
If you’re facing issues with your GE wall oven, you’re not alone. Wall ovens, like any other appliance, can develop problems over time. But fret not! In this comprehensive guide, we’ll explore ten common problems, identify ten potential damaged parts, provide a step-by-step troubleshooting guide, and offer valuable maintenance tips to keep your GE wall oven in top-notch condition.
Section 1: Common Wall Oven Problems
- Oven Not Heating: When your oven refuses to warm up, it can be frustrating. We’ll discuss possible reasons and solutions.
- Oven Uneven Cooking: Learn why your dishes aren’t cooking evenly and how to rectify this problem.
- Faulty Temperature Control: Discover what might be causing temperature discrepancies and how to recalibrate your oven.
- Oven Door Issues: If your oven door isn’t closing properly or has become misaligned, we’ve got the fixes.
- Self-Cleaning Problems: Self-cleaning cycles not working as expected? We’ll provide insights.
- Noisy Oven Operation: Unusual noises can be bothersome. Find out what could be the source of the noise and how to address it.
- Oven Light Not Working: A non-functional oven light can be a nuisance. We’ll guide you on replacing the bulb and troubleshooting.
- Display Errors: Understand the meaning behind error codes and how to interpret and address them.
- Burner Problems: If your oven’s burners are malfunctioning, we’ll help you pinpoint the issue and provide solutions.
- Sudden Shutdowns: Learn why your oven might suddenly turn off and what steps to take.
Section 2: Potential Damaged Parts
- Heating Element: A faulty heating element can cause heating problems.
- Thermostat: Temperature control issues may stem from a malfunctioning thermostat.
- Door Gasket: Uneven cooking can be due to a damaged door gasket.
- Oven Light Bulb: A burnt-out bulb can leave your oven in the dark.
- Fan Motor: Noisy operation may be linked to a malfunctioning fan motor.
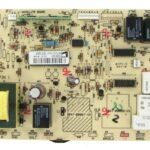
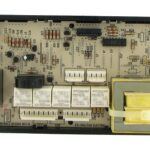
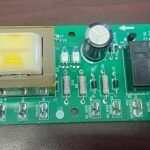
- Control Board: Display errors often involve the control board.
- Burner Elements: Burner problems can result from damaged burner elements.
- Safety Valve: If your oven shuts down unexpectedly, it might be due to a faulty safety valve.
- Igniter: Igniter problems can lead to issues with heating.
- Thermal Fuse: Sudden shutdowns might be related to a damaged thermal fuse.
You May Need These Parts:
Section 3: Step-by-Step Troubleshooting Guide
Here’s a step-by-step troubleshooting guide for common issues with a GE wall oven:
Step 1: Check the Power Supply
- Ensure the oven is properly plugged in and that there’s power to the outlet. Try plugging in another appliance to confirm if there’s power.
Step 2: Verify the Timer and Settings
- Check that the oven timer and settings are correct. Sometimes, simple settings errors can lead to perceived issues.
Step 3: Oven Not Heating
- If the oven is not heating, ensure it’s set to the desired temperature.
- Verify that the heating element is working correctly. Look for visible damage or signs of malfunction.
Step 4: Uneven Cooking
- Use an oven thermometer to confirm if there are hot and cold spots.
- Adjust the oven rack position to ensure proper airflow and heat distribution.
Step 5: Faulty Temperature Control
- Preheat the oven and use an oven thermometer to confirm the actual temperature. Compare it with the set temperature.
- If there’s a discrepancy, consult your oven’s manual for calibration instructions.
Step 6: Oven Door Issues
- Inspect the door gasket for damage or improper sealing.
- Check for obstructions in the door hinges or latches that might cause misalignment.
Step 7: Self-Cleaning Problems
- Ensure the oven door is locked properly during the self-cleaning cycle.
- Check if there are any error codes displayed on the control panel and refer to the manual for guidance.
Step 8: Noisy Oven Operation
- Identify the source of the noise. It could be a fan, motor, or any moving part.
- If the noise is unusual, consult the manual for guidance or consider calling a technician.
Step 9: Oven Light Not Working
- Replace the oven light bulb if it’s burnt out.
- Check for loose or damaged wiring if replacing the bulb doesn’t fix the issue.
Step 10: Display Errors
- Take note of any error codes displayed on the control panel.
- Consult the oven’s manual for a list of error codes and their meanings.
Step 11: Burner Problems (For Stovetop)
- Ensure the burners are clean and free from debris.
- If a burner doesn’t ignite, check the igniter and wiring for issues.
Step 12: Sudden Shutdowns
- If the oven shuts off unexpectedly, wait for it to cool down, and then check for overheating issues.
- Inspect the safety valve and thermal fuse for any signs of damage or malfunction.
For any issues that you can’t resolve through these troubleshooting steps, it’s advisable to contact a professional technician or GE’s customer support for further assistance or repair.
Section 4: Maintenance Tips
Here are some maintenance tips to keep your GE wall oven in optimal condition:
- Regular Cleaning:
- Clean the oven’s interior, racks, and the oven door regularly to prevent the buildup of food residues and grease.
- Use a non-abrasive oven cleaner and follow the manufacturer’s recommendations for cleaning.
- Replace Oven Gaskets:
- Check the oven door gaskets for wear and tear. Replace them if they are damaged to maintain proper sealing and insulation.
- Clean Burners and Stovetop:
- If your wall oven has a stovetop, clean the burners and the surface regularly to prevent clogs and uneven heating.
- Change Oven Light Bulbs:
- Replace burnt-out oven light bulbs promptly to ensure you can monitor the cooking process effectively.
- Inspect and Clean Ventilation:
- Ensure that the oven’s ventilation system, including fans and filters, is clean and free from debris to prevent overheating.
- Calibrate Temperature:
- Periodically check if your oven’s temperature matches the set temperature. Recalibrate if necessary to ensure accurate cooking.
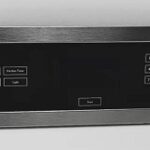
- Clean Control Panel:
- Gently clean the control panel and knobs with a damp cloth to prevent dirt or residue from affecting the operation.
- Check Door Hinges and Seals:
- Inspect the oven door hinges and seals for proper alignment and sealing. Adjust or replace them if necessary.
- Clean Exterior:
- Wipe down the exterior of the oven, including the control panel, with a mild soapy solution to remove dirt and fingerprints.
- Ventilation Check:
- Ensure that the oven’s ventilation is clear and unobstructed to prevent overheating and to maintain safe operation.
- Safety Valve Inspection:
- Periodically check the safety valve for any signs of damage or malfunction to prevent sudden shutdowns.
- Regular Service:
- Consider scheduling annual or bi-annual professional servicing to inspect and maintain the oven’s internal components.
- Read the Manual:
- Familiarize yourself with the user manual to understand specific maintenance recommendations and guidelines for your GE wall oven.
By following these maintenance tips, you can extend the lifespan of your GE wall oven, ensure it operates efficiently, and minimize the risk of common problems and breakdowns.
Conclusion: With this guide, you’re equipped to tackle the most common GE wall oven problems, identify damaged parts, troubleshoot effectively, and maintain your oven for years of delicious, hassle-free cooking. Don’t let oven issues stand in the way of your culinary adventures—take control with these expert insights. You can see more “Range/Oven Troubleshooting Guides” here.
More Range/Oven Troubleshooting Guides:
- Thermador Range Relay Control Board 16-10-660 00415618Fix your range today with the Thermador Range Relay Control Board 16-10-660 00415618. Ensure optimal … Read more
- Frigidaire Oven Control Board 316272206Fix your oven today with the Frigidaire Oven Control Board 316272206, ensuring efficient cooking and … Read more
- Thermador Range Control Board 010-00157-02Ensure seamless culinary adventures by promptly repairing your Thermador Range Control Board, model number 010-00157-02, … Read more
- Oven Control Panel W10517896 W10617330 3023327 AP5787789Are you looking for the Oven Control Panel W10517896? Find the perfect replacement to restore … Read more
- Range Control Board 4453377 4451653 4452482 4453167 4453167RFix your range oven today with the Range Control Board 4453377. Ensure precise temperature control … Read more

